EKS 모니터링, Cloudwatch 세팅부터 slack 알람까지 본문
EKS 모니터링하기 / Cloudwatch 세팅부터 Metric slack 알람까지
1. EKS의 Metric 정보를 fluentbit와 cloudwatch agent를 이용하여 Cloudwatch로 모니터링한다.
2. Cloudwatch의 알람을 Slack으로 전송한다.
docs : https://catalog.us-east-1.prod.workshops.aws/workshops/9c0aa9ab-90a9-44a6-abe1-8dff360ae428/ko-KR/90-monitoring/100-build-insight
CWagent 설치와 Fluentbit 를 Daemonset 으로 선언
cwagent-fluent-bit-quickstar.yaml 다운 받는다.
wget https://raw.githubusercontent.com/aws-samples/amazon-cloudwatch-container-insights/latest/k8s-deployment-manifest-templates/deployment-mode/daemonset/container-insights-monitoring/quickstart/cwagent-fluent-bit-quickstart.yaml
EKS 설정에 맞게 환경 변수 선언한다.
ClusterName=${ClusterName}
RegionName=${RegionName}
FluentBitHttpPort=${FluentBitHttpPort}
FluentBitReadFromHead='Off'
[[ ${FluentBitReadFromHead} = 'On' ]] && FluentBitReadFromTail='Off'|| FluentBitReadFromTail='On'
[[ -z ${FluentBitHttpPort} ]] && FluentBitHttpServer='Off' || FluentBitHttpServer='On'
앞서 설치한 cwagent-fluent-bit-quickstar.yaml 에 eks 설정 정보를 대입한다.
sed -i -e 's/{{cluster_name}}/'${ClusterName}'/;s/{{region_name}}/'${RegionName}'/;s/{{http_server_toggle}}/"'${FluentBitHttpServer}'"/;s/{{http_server_port}}/"'${FluentBitHttpPort}'"/;s/{{read_from_head}}/"'${FluentBitReadFromHead}'"/;s/{{read_from_tail}}/"'${FluentBitReadFromTail}'"/' cwagent-fluent-bit-quickstart.yaml
오픈한 후, 아래 내용을 fluent-bit의 DaemonSet spec으로 추가한다.
affinity:
  nodeAffinity:
    requiredDuringSchedulingIgnoredDuringExecution:
      nodeSelectorTerms:
      - matchExpressions:
        - key: eks.amazonaws.com/compute-type
          operator: NotIn
          values:
          - fargate
cwagent-fluent-bit-quickstar.yaml 을 적용한다.
kubectl create ns amazon-cloudwatch
kubectl apply -f cwagent-fluent-bit-quickstart.yaml
IAM policy 추가
아래 IAM policy를 EKS의 각 노드 인스턴스에 추가한다.
{
    "Version": "2012-10-17",
    "Statement": [
        {
            "Action": [
                "ec2:DescribeVolumes"
            ],
            "Resource": "*",
            "Effect": "Allow"
        }
    ]
}
ERROR : Could not retrieve ec2 metadata from IMDS
Fluentbit pod에서 아래와 같은 IMDS 에러 로그가 출력되는 상황이다.
[2023/05/30 01:42:47] [error] [filter:aws:aws.2] Could not retrieve ec2 metadata from IMDS
해당 pod에 들어가 아래 커멘드를 입력한다.
curl -w "%{http_code}\n" http://169.254.169.254/
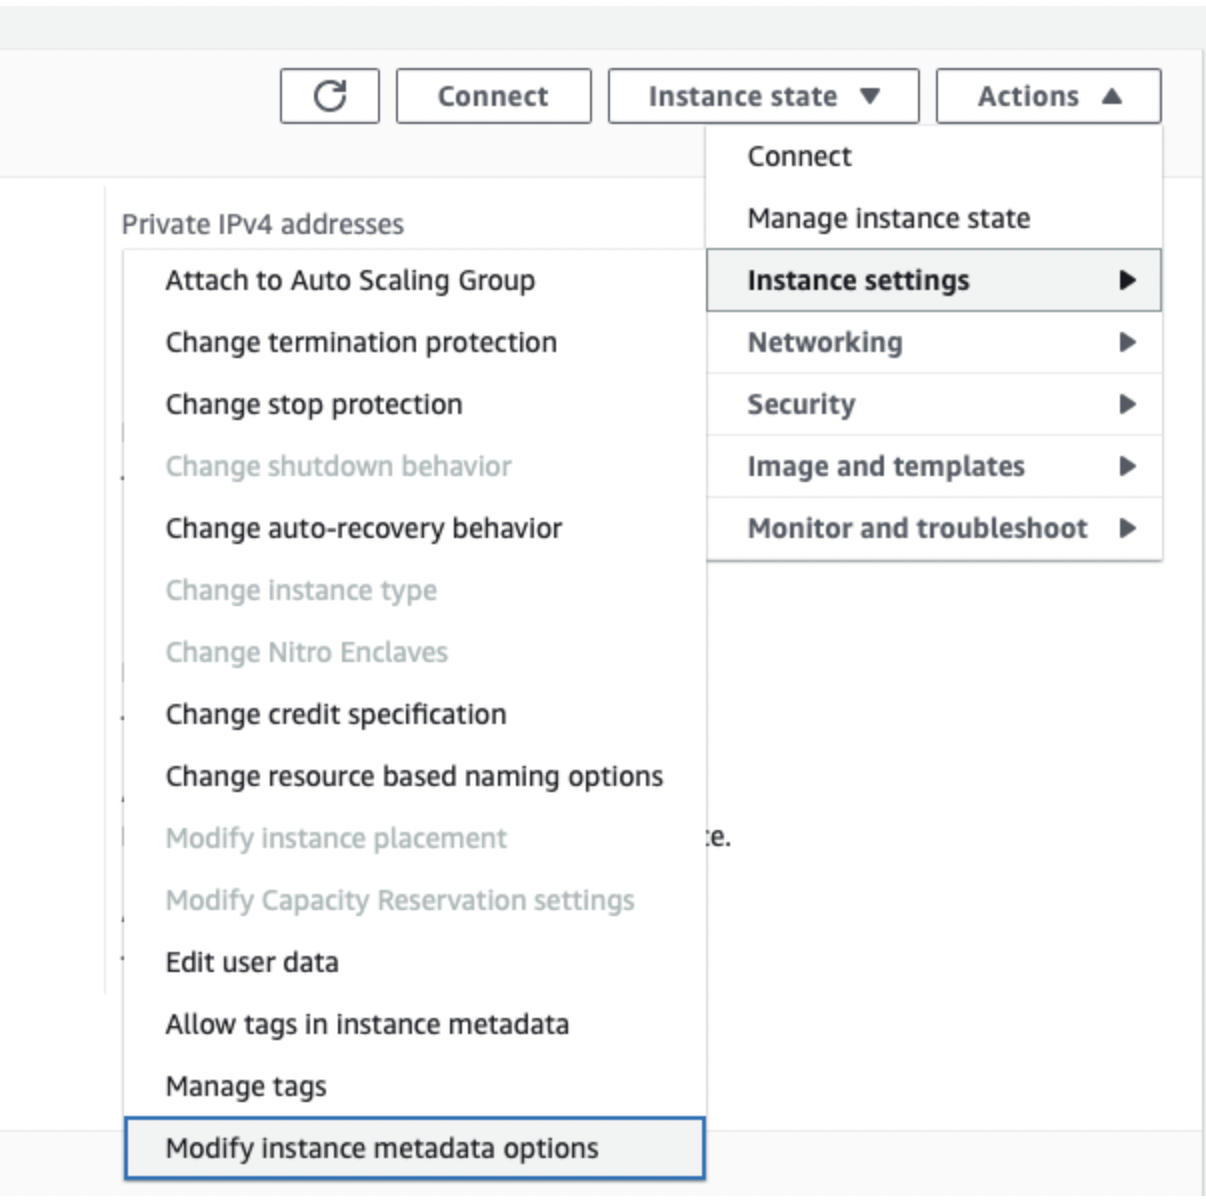
401 응답이 발생하는 경우 ec2 인스턴스에 접속하여 메타 데이터 옵션 -> IMDSv2를 optional로 수정해준다. 내 환경의 경우 AWS karpenter를 이용해서 노드를 오토 스케일링하고 있다. karpenter의 옵션으로 IMDSv2를 optional로 지정할 수 있었다.
Cloudwatch 대시보드
이제 Cloudwatch metirc으로 EKS Container Insights를 선택할 수 있다.
각 노드, 팟별 Cpu 나 메모리 사용률, ingress controller의 요청 수와 응답 현황 등을 쿼리할 수 있다.
Cloudwatch metric alert to Slack
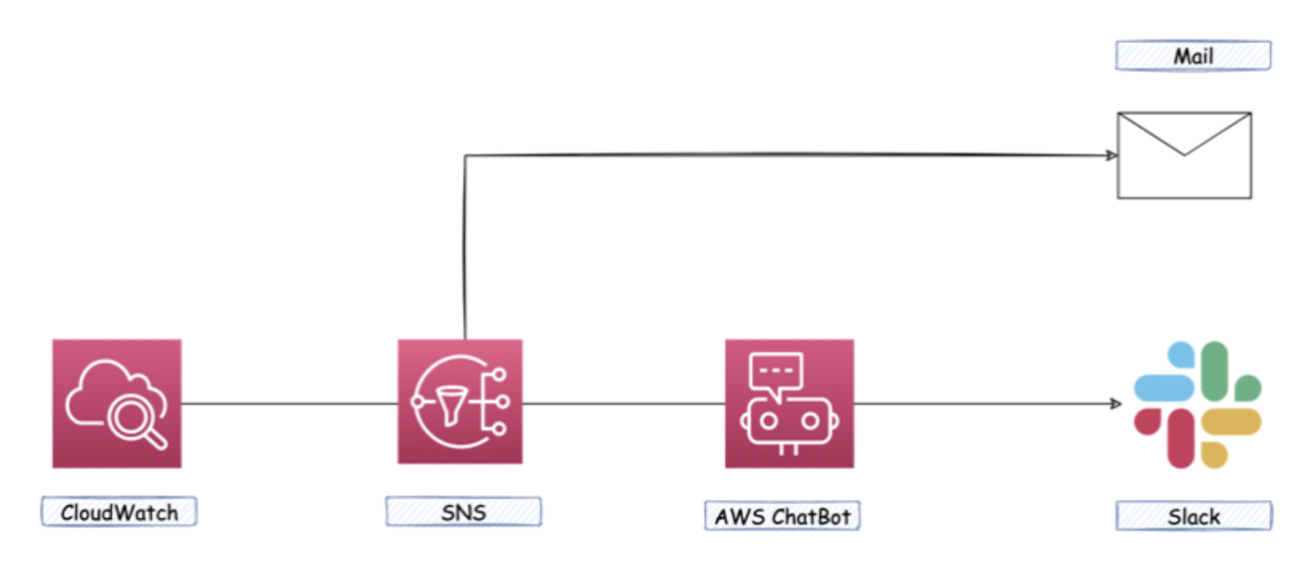
이렇게 수집한 metric으로 cloudwathc에서 알람을 만들 수 있고, 그걸 트리거해 slack과 메일로 전송하는 알람 플로우를 만든다. 전송 주체를 AWS chatbot이나 Lambda를 사용할 수 있다.
1. Create SNS Topic
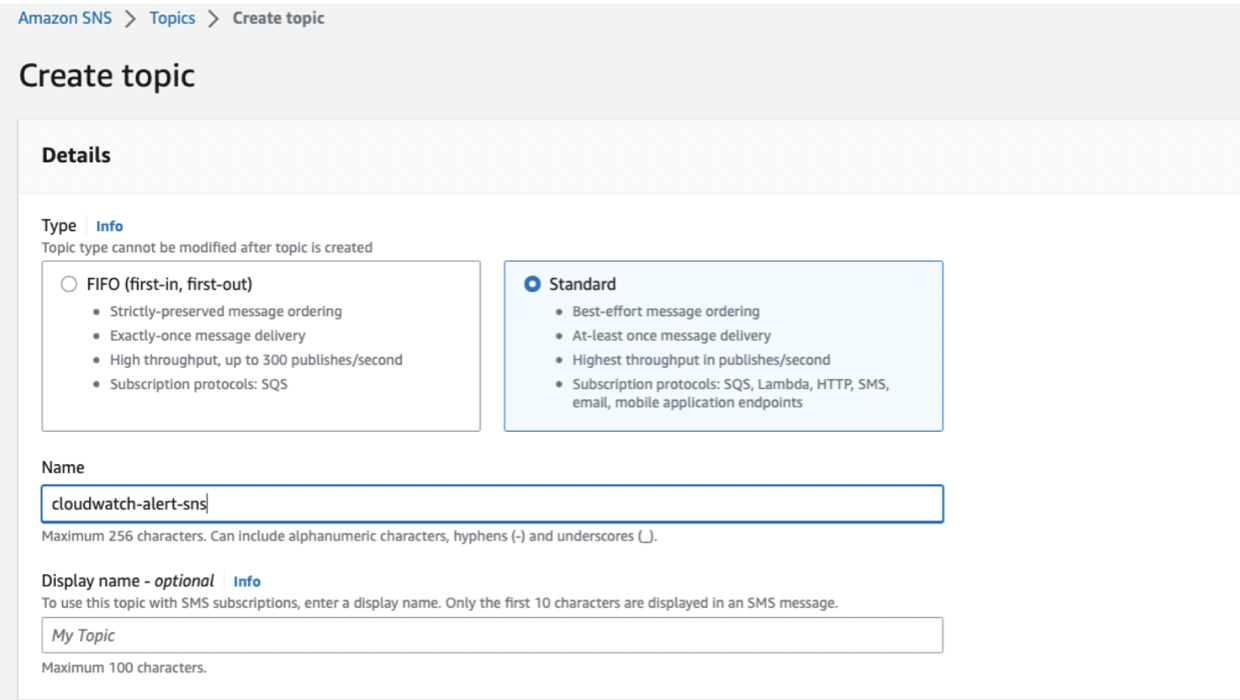
Cloudwatch 알람이 발생하면 SNS로 보내도록 할 것이다. 이때 프로토콜을 Email, 엔드포인트로 메일을 받고자 하는 메일을 입력하고, 해당 메일에 확인 메일이 오면 Confirm 하면 된다.
2. Create cloudwatch alarm
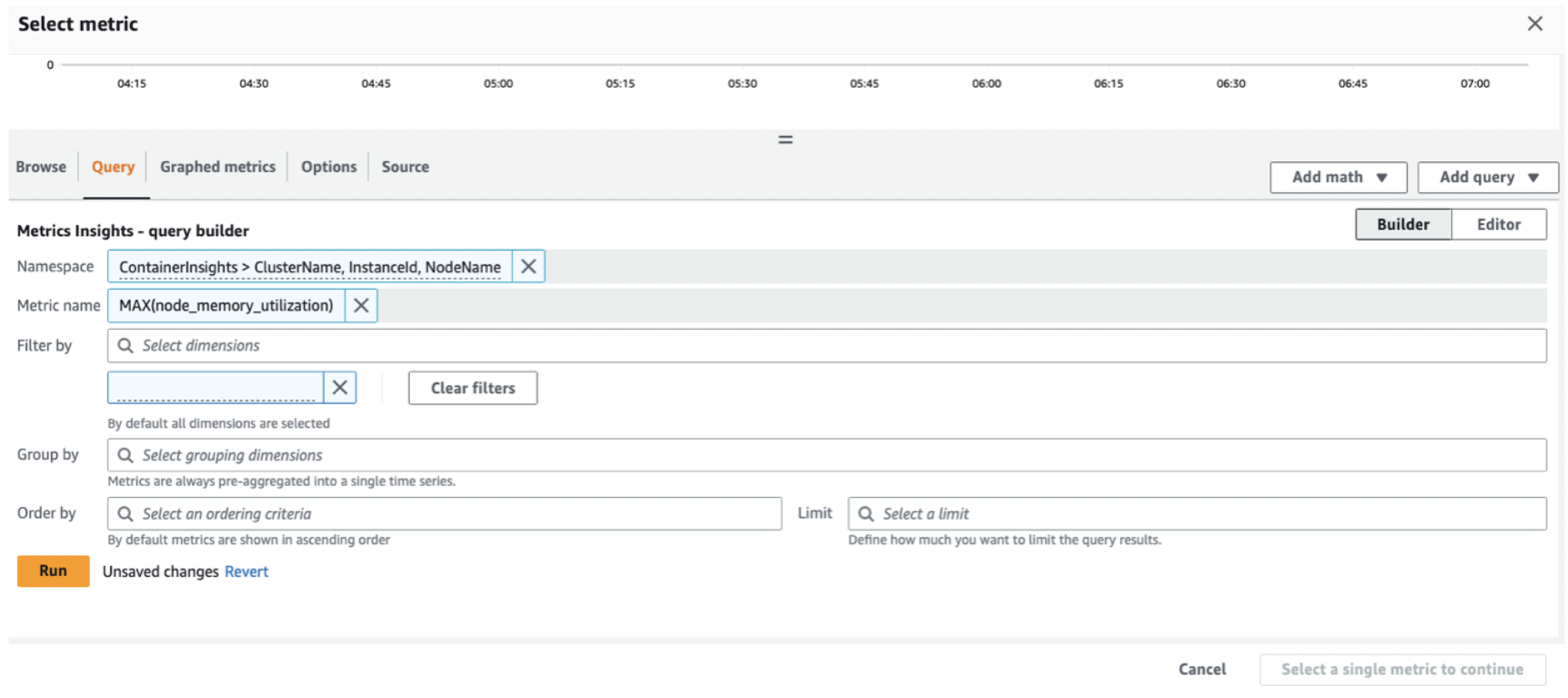
Cloudwatch에서 어떤 메트릭을 어떤 기준으로 알람 이벤트를 만들 것인지 정한다. 알람으로 앞서 생성한 SNS topic을 입력하면 정한 기준에 따라 해당 메일로 알람이 발생된다.
3. Set trigger / Message sender
Cloudwatch의 알람 이벤트가 발생하면 SNS가 실행되어 메일이 전달된다. 이번엔 SNS가 실행됨을 trigger하여 Slack으로 해당 내용을 전송하려고 한다. 이 주체는 Lambda와 AWS Chatbot을 사용할 수 있다.
나는 Lambda로 외부 api 요청을 하는 방법이랑 Chatbot을 사용하는 방법 두가지를 테스트했다. 일단 그 두 방식을 모두 적긴 하는데 Lambda는 좀 더 유연하게 메시지를 만들 수 있지만 lambda 코드를 관리하는게 불편하고 그냥 Chatbot으로 설정하기로 했다.
아 참고로 비용은 SNS - HTTP/HTTPS로 전송하는 경우 매월 첫 1백만 개는 무료라 거의 생각을 안해도 될 정도로 싸다. Chatbot 역시 다른 비용이 추가되지 않는다. 생각해야 할 것은 Lambda로 전송하는 경우의 Lambda 비용과 Cloudwatch의 metric/alarm 비용인데 특히 후자가 생각보다 비싸니 확인하길 바란다.
3-1 AWS Chatbot을 이용하는 방법
AWS chatbot → Configure new client으로 슬랙을 선택한다.

슬랙의 AWS chatbot plugin을 사용하여 채널 정보와 cloudwatch alarm을 묶은 topic 정보를 입력한다. 이때 Channel guardrail policies에 cloudwatchReadOnlyAccess를 추가해야 한다.

Result - AWS Chatbot to Slack

3-2 Lambda를 사용하는 방법
Lambda를 생성한다.
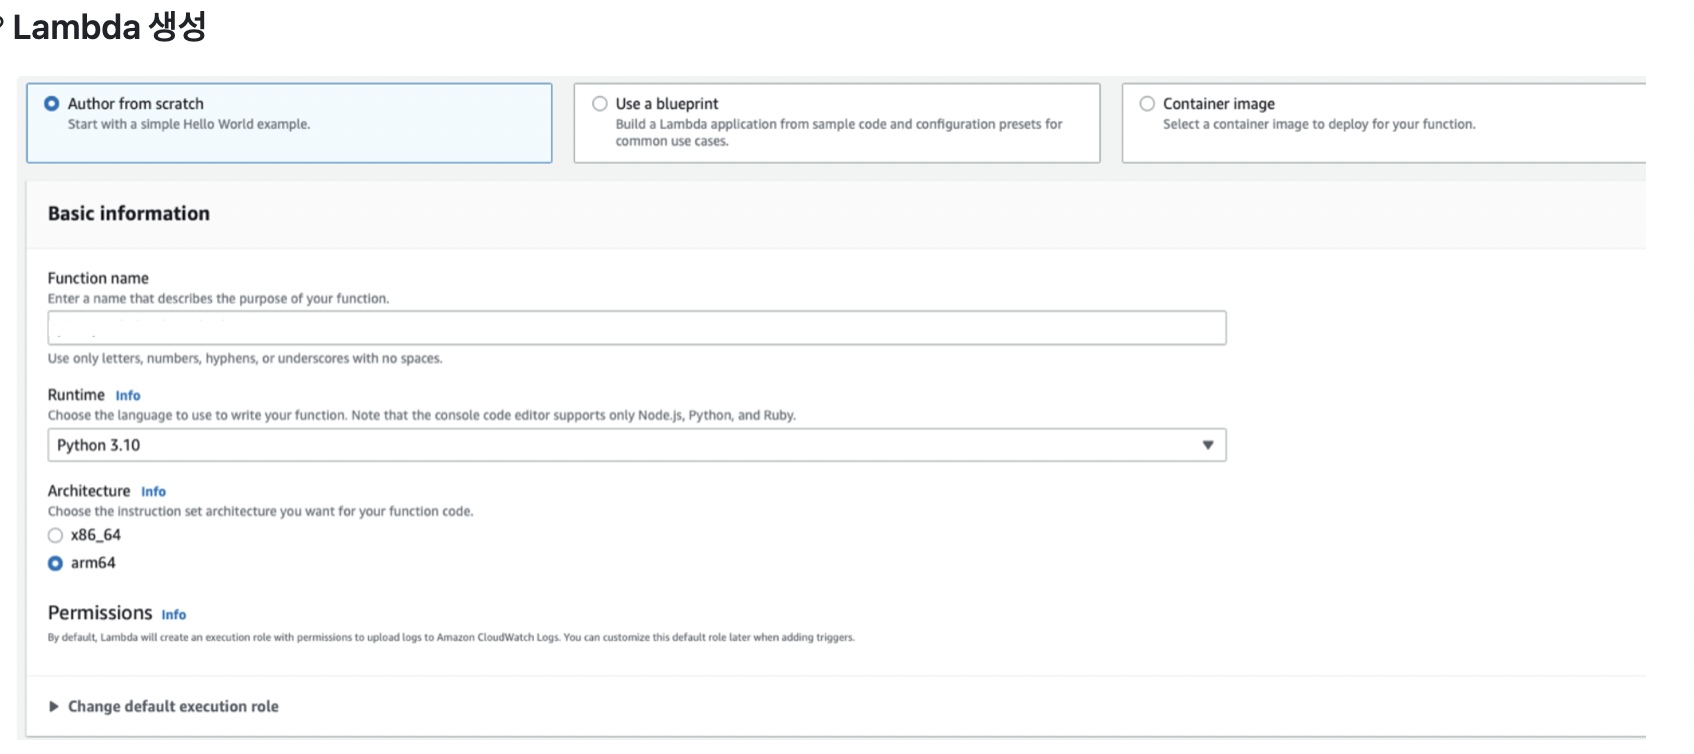
Runtime을 python 3.10으로 잡고 아래 lambda_function.py를 code source로 정의한다. 슬랙 webhook URL은 슬랙의 webhook plugin 을 설정하여 얻는다.
import urllib3
import json
http = urllib3.PoolManager()
def lambda_handler(event, context):
    url = "${SLACK_WEBHOOK_URL}"
    message = json.loads(event['Records'][0]['Sns']['Message'])

    alarm_name = message['AlarmName']
    new_state = message['NewStateValue']
    state_changed_time = message['StateChangeTime']
    new_state_reason = message['NewStateReason']

    msg = {
        "channel": "${CHANNEL_NAME}",
        "username": "cloudwatch",
        "icon_emoji" : "",
        "text": (
            "time : " + state_changed_time + "\n"
            "alarm name : " +  alarm_name + "\n" \
            "state : " + new_state + "\n" \
            "reason : " + new_state_reason + "\n"
        )
    }
    encoded_msg = json.dumps(msg).encode('utf-8')
    resp = http.request('POST',url, body=encoded_msg)
    print({
        "message": event['Records'][0]['Sns']['Message'],
        "status_code": resp.status,
        "response": resp.data
    })
Cloudwatch alarm event sample
Test 이벤트를 정의할 때 도움이 되었던 Cloudwatch alarm sample이다.
{
  "Records": [
    {
      "EventSource": "aws:sns",
      "EventVersion": "1.0",
      "EventSubscriptionArn": "arn:aws:sns:eu-west-1:000000000000:cloudwatch-alarms:xxxxxxxx-xxxx-xxxx-xxxx-xxxxxxxxxxxx",
      "Sns": {
        "Type": "Notification",
        "MessageId": "xxxxxxxx-xxxx-xxxx-xxxx-xxxxxxxxxxxx",
        "TopicArn": "arn:aws:sns:eu-west-1:000000000000:cloudwatch-alarms",
        "Subject": "ALARM: \"Example alarm name\" in EU - Ireland",
        "Message": "{\"AlarmName\":\"Example alarm name\",\"AlarmDescription\":\"Example alarm description.\",\"AWSAccountId\":\"000000000000\",\"NewStateValue\":\"ALARM\",\"NewStateReason\":\"Threshold Crossed: 1 datapoint (10.0) was greater than or equal to the threshold (1.0).\",\"StateChangeTime\":\"2017-01-12T16:30:42.236+0000\",\"Region\":\"EU - Ireland\",\"OldStateValue\":\"OK\",\"Trigger\":{\"MetricName\":\"DeliveryErrors\",\"Namespace\":\"ExampleNamespace\",\"Statistic\":\"SUM\",\"Unit\":null,\"Dimensions\":[],\"Period\":300,\"EvaluationPeriods\":1,\"ComparisonOperator\":\"GreaterThanOrEqualToThreshold\",\"Threshold\":1.0}}",
        "Timestamp": "2017-01-12T16:30:42.318Z",
        "SignatureVersion": "1",
        "Signature": "Cg==",
        "SigningCertUrl": "https://sns.eu-west-1.amazonaws.com/SimpleNotificationService-xxxxxxxxxxxxxxxxxxxxxxxxxxxxxxxx.pem",
        "UnsubscribeUrl": "https://sns.eu-west-1.amazonaws.com/?Action=Unsubscribe&SubscriptionArn=arn:aws:sns:eu-west-1:000000000000:cloudwatch-alarms:xxxxxxxx-xxxx-xxxx-xxxx-xxxxxxxxxxxx",
        "MessageAttributes": {}
      }
    }
  ]
}
그리고 이 Lambda가 실행될 trigger로 SNS를 붙여준다.
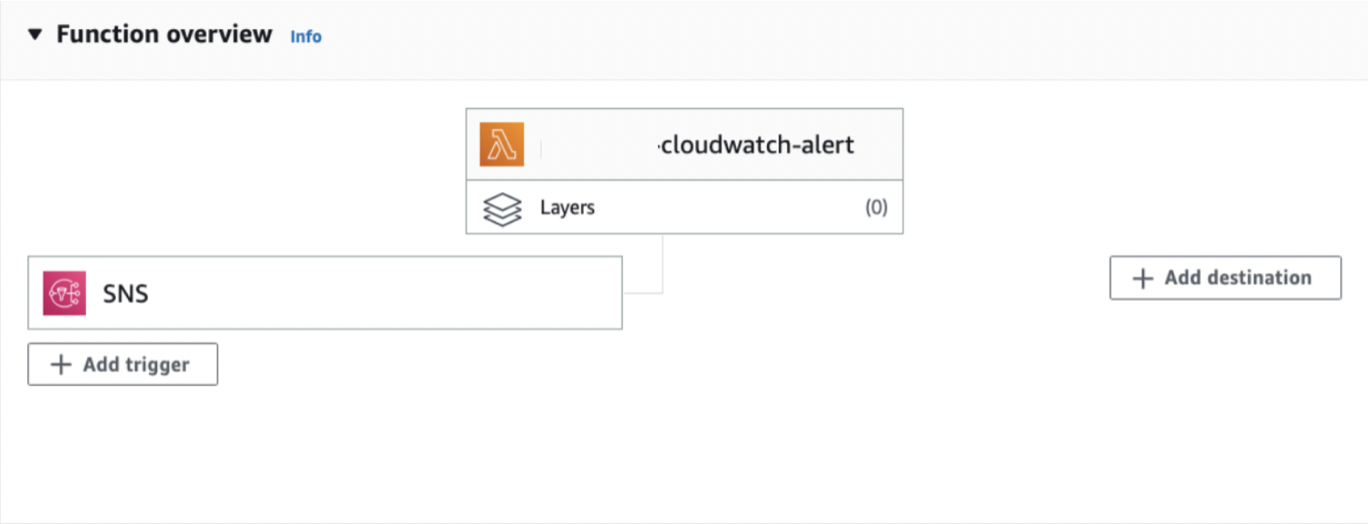
Result - lambda to slack

'Architecture > Infrastructure' 카테고리의 다른 글
| Mysql Replication, DB 부하 분산 (0) | 2023.11.05 |
|---|---|
| EKS Endpoint access 를 private 으로 (0) | 2023.08.30 |
| Kubernetes apt repository updated : NO_PUBKEY B53DC80D13EDEF05 (0) | 2023.06.06 |
| Vault hands-on, 가장 기본적인 기능들 (0) | 2023.04.23 |
| AWS 자원 생성 시 태깅을 강제하는 IAM Policy (0) | 2023.03.13 |
